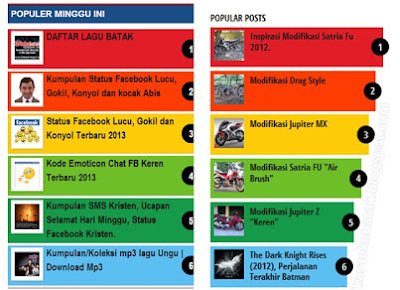
Cara membuat popular post warna warni seperti gambar diatas atau yang ada diblog ini caranya sangat gampang. Tapi sebelumnya pastikan widget popular post diblog hanya menampilkan thumbnail dan judul saja.

Cara Membuat Popular Post Berwarna-warni :
1. Login di Akun Blog → pilih Tema
2. Setelah itu masuk ke Editor HTML Template,
3. Copy kode CSS berikut ini dan tempel diatas kode ]]></b:skin> atau </style> :
/* Custom CSS for Blogger Popular Post Widget */
.PopularPosts ul,.PopularPosts li,.PopularPosts li img,.PopularPosts li a,.PopularPosts li a img {margin:0 0;padding:0 0;list-style:none;border:none;background:none;outline:none;}
.PopularPosts ul {margin:.5em 0;list-style:none;color:black;counter-reset:num;}
.PopularPosts ul li img {display:block;margin:0 .5em 0 0;width:50px;height:50px;float:left;}
.PopularPosts ul li {background-color:#eee;margin:0 10% .4em 0 !important;padding:.5em 1.5em .5em .5em !important;
counter-increment:num;position:relative;}
.PopularPosts ul li:before,.PopularPosts ul li .item-title a, .PopularPosts ul li a {font-weight:bold;color:#000 !important;
text-decoration:none;}
.PopularPosts ul li:before {content:counter(num) !important;display:block;position:absolute;background-color:#333;
color:#fff !important;width:22px;height:22px;line-height:22px;text-align:center;top:0px;right:0px;padding-right:0px !important;}
/* Set color and level */
.PopularPosts ul li:nth-child(1) {background-color:#A51A5D;margin-right:0% !important}
.PopularPosts ul li:nth-child(2) {background-color:#F53477;margin-right:0% !important}
.PopularPosts ul li:nth-child(3) {background-color:#FD7FAA;margin-right:0% !important}
.PopularPosts ul li:nth-child(4) {background-color:#FF9201;margin-right:0% !important}
.PopularPosts ul li:nth-child(5) {background-color:#FDCB01;margin-right:0% !important}
.PopularPosts ul li:nth-child(6) {background-color:#DEDB00;margin-right:0% !important}
.PopularPosts ul li:nth-child(7) {background-color:#89C237;margin-right:0% !important}
.PopularPosts ul li:nth-child(8) {background-color:#44CCF2;margin-right:0% !important}
.PopularPosts ul li:nth-child(9) {background-color:#01ACE2;margin-right:0% !important}
.PopularPosts ul li:nth-child(10) {background-color:#94368E;margin-right:0% !important}
.PopularPosts .item-thumbnail {margin:0 0 0 0;}
.PopularPosts .item-snippet {font-size:11px;}
.profile-img{display:inline;opaciry:10;margin:0 6px 3px 0;}
4. Terakhir klik Simpan / Publish
5. Selesai.
Lihat widget populer pos yang sudah berwarna-warni seperti pelangi
Bagaimana? menarik bukan?
Sampai disini dulu yah cara membuat popular post warna warni ini.